Qualify Property Maintenance Needs with Go iLawn and Go iPave’s Measurement Grouping Feature

Opening hour at the Go iLawn booth during the 2013 SIMA Symposium in Minneapolis, MN.
We’re back in the office this week fresh from the SIMA Symposium in Minneaplois, MN where we got to meet some new faces and reconnect with familiar ones. I’m still not sure what’s more fun as an exhibitor, introducing our products to new people or showing existing users features and enhancements they haven’t used before.
In both situations, I find myself showing off our measurement grouping feature. It’s a relatively new addition to our property measuring tools, and it’s something that all Go iLawn and Go iPave users need to try.
Why You Should Strategically Group Property Measurements
Simply put, grouping measurements will help you turn your property measurements into a proposal faster. It’s easier to qualify every aspect of performing the services you are proposing if you can review property information in strategic, bite-size chunks.
Plus, everyone that is involved in the proposal process at a service company- from estimators and sales staff, to office managers and production crews- will benefit from this. Material, equipment, labor and management needs for a property will be determined more efficiently if basic property information, like measurements, are separated for everyone to see.
How to Group Property Measurements for Landscaping, Paving and Snow Removal Estimates
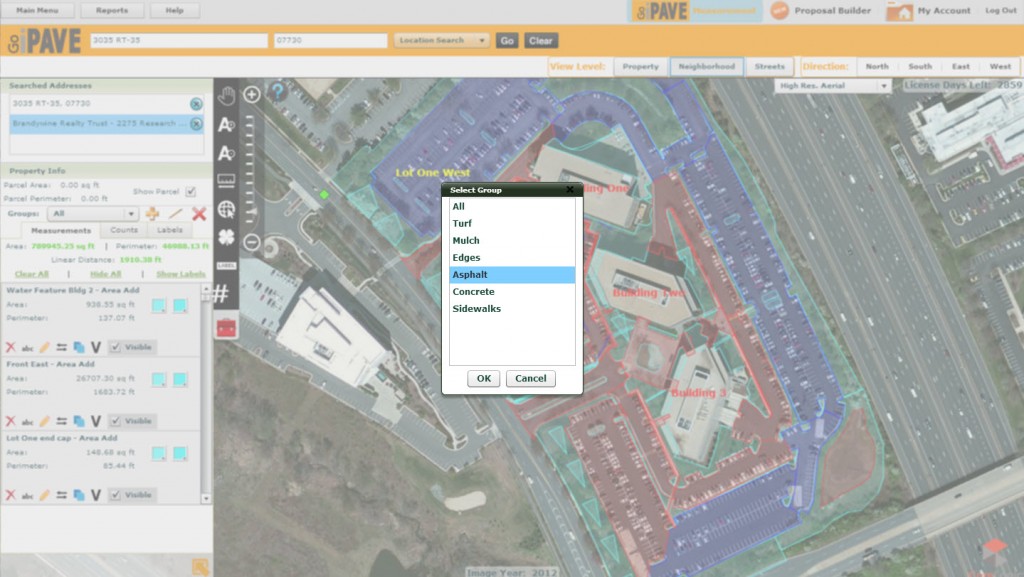
The standard measurement groups we show everyone when they log in to Go iLawn and Go iPave are: turf, mulch, edges, asphalt, concrete and sidewalks. These are designed to help our users group their measurements by surface type. You can try this out in two different ways.
The first way is to select the group that you want your measurements to go into, and then begin measuring areas that belong in that group. For example, if I’m measuring a property for sealcoating, I would select the ‘asphalt’ group. Then I would turn on the area measuring tool and measure the parking lot areas that I’m proposing to sealcoat. When I’m finished measuring the parking lot, this measurement and any subsequent measurements I take while I’m in the ‘asphalt’ group will be categorized as such.
The second way to do this, is to group measurements after they’ve been taken. To do this, right click on a completed measurement and the right click menu will appear. From the right click menu, select “Assign to Group”. The groups will pop up and you can select the group you want to put the measurement in. If you have already measured a property and you want to group your measurements after the fact, you can load up your workspace file and group your measurements with this method.
Watch the short video below to see this in action (only 2 minutes):
Add, Change or Delete or Customize Groups
Better yet is the fact that the measurement grouping feature is completely customizable. You can change group names, units of measure (sq. feet, acres, sq. yards), the color of measurements in a group, and the areas of our Proposal Builder you want measurements to appear in.
We have users that group measurements in a variety of categories: by equipment type, areas that will need special attention, crew members name and area of responsibility, areas that need mowed weekly, bi-weekly, monthly etc, and areas that will be completed in different phases. If you can think up a way that you want to categorize your property measurements for estimates, you can make it happen with the measurement grouping feature.
To learn how to create custom groups, watch this video:
Give this a try and let us know what you think about the grouping feature in the comments section of this post.


Leave a Reply
Want to join the discussion?Feel free to contribute!